Note: current version of this manual can be found at Manual
For developers see OpenArena Developers Manual
Welcome to the Arena! This is where warriors from around the world will meet! There is no attendance fee so everyone is invited to join. (Well, we need some kind of short ingame-introtext and I'm no Shakespeare...)
Welcome and thank you for downloading/copying OpenArena!
First this is a completely free game and always will be free!
The game is released under the terms of the GNU GPL v2 license (GPLv2+).
Warning: some graphic contents of the game is not for children.
Installing the game[]
Installing OpenArena[]
Windows[]
System Requirements[]
- Minimum
- Pentium II 233MHz / AMD K6-2 300MHz or equally powerful processor
- 64MB of system memory
- OpenGL supported video card with 16MB of video memory. (Voodoo Banshee, TNT and up)
- 300MB of hard drive space
Technically, the game can run on a 486DX machine but for minimal requirements we expect a certain level of playability to draw the line.
Installation[]
- Download the latest zip archive(s) of OpenArena from one of the Download Mirrors or BitTorrent.
- Unzip the archive(s) using a program like WinZip or 7-Zip.
- Open the extracted folder and launch "openarena.exe".
- Frag away!
Linux[]
System Requirements[]
- Minimum
- Pentium II 233MHz / AMD K6-2 300MHz or equally powerful processor
- 64MB of system memory
- OpenGL supported video card with 16MB of video memory. (Voodoo Banshee, TNT and up)
- 300MB of hard drive space
In theory, the game can run on any Pentium-class processor with a Voodoo2, but don't expect much performance over 20fps and expect loading time to be over a minute.
You must have accelerated drivers for your video card installed for best results. This may require using the not-entirely-open-source NVIDIA drivers for NVIDIA cards. This also means that some video cards may not work even if they meet the above-stated minimum requirements.
IMPORTANT: Various Linux repositories contain OpenArena packages. Such repositories are run by third-party, so their OA installs may have some small differences from the official packages. Sometimes, these differences may cause some problems. To avoid such problems, you may prefer to manually download an official OpenArena package from http://www.openarena.ws, as explained below. It is the recommended way. If you wish to try with Linux repositories packages anyway, you can read the distro-related sections below.
Installation (ZIP)[]
Make sure you have the prerequisite libraries. They may include:
- SDL
- openal
- curl
- libvorbis
Get the official package of the game from one of the download mirrors, then extract all the contents of the zip.
The following versions are available:
*.i386 are for 32-bit PC processors. (386, 486, 586 and 686)
*.x86_64 are for 64-bit PC processors, such as AMD Athlon64 processors.
For a typical desktop or laptop PC, the following will work:
/usr/local/openarena/openarena-0.8.1/openarena.i386
The archives' contents itself are the game. They simply need to be extracted and run.
You can create a launcher on your desktop for convenience.
Ubuntu[]
Be aware that these packages may be outdated, regarding Ubuntu's release calendar and OA's release calendar.
- Open the Software Center, go to the Games category, go to the Arcade subcategory and choose OpenArena.
Alternatively...
- Open a console and write sudo apt-get install openarena.
In both, after installing...
- Select the OpenArena entry, from the Applications menu, under Games.
If you have problems with it running, see the FAQ/Troubleshooting page.
OpenSuse[]
Packages for openSUSE are being built in the openSUSE Build Service. RPMs are available for all supported version of SUSE Linux / openSUSE, including SLE.
Use the one click installer for your version at openSUSE Build Service: Search for openarena
Mandriva[]
Use the GUI rpmdrake to install openarena as described in installing and removing software documentation.
Type "urpmi openarena" in the terminal as root.
Debian[]
Type "apt install openarena" in the terminal as root
Fedora[]
From a console or terminal emulator:
su -c "yum install openarena"
Alternatively, you may use your package manager of choice to select OpenArena under the "Games" category.
Pardus[]
- Click the "Add/Remove programs"
- Under games you will find "openarena"
- Select it
- Press install button
Gentoo[]
sudo emerge -av =games-fps/openarena-0.8.8
You might want to check your curl, openal and vorbis USE-flags.
Source Mage GNU/Linux[]
OpenArena is available in z-rejected grimoire. If you don't have this grimoire installed yet, you can add it by doing from a console or a terminal emulator:
scribe add z-rejected
Once you have z-rejected grimoire, you can install OpenArena by doing from a console or a terminal emulator:
cast openarena-bin
Arch Linux[]
OpenArena is no longer in the official Community-repository. Instead, install yaourt to access the Arch User Repository and run the following command to install OpenArena:
yaourt -S openarena
Mac[]
Extract the zip file to a folder of your choice. Double click on the application. Simple as.
However, if you are using OSX 10.7.5 or later, please read the notes about "unsigned apps" below. In case of OpenArena 0.8.8, please also read the following section about it. Since OSX 10.12, things are more complex, and since 10.15, they are even worse.
If you want to install it: copy the folder to /Applications.
Notes:
- If you have not enabled running "unsigned apps" on your machine, hold control while you click, then select "Open" from the menu. You might get a message asking you to confirm the first time and then it should work flawlessly. According to Apple Gatekeeper support page, this should apply to OSX 10.7.5 and later.
- Since OSX 10.12 (Sierra), Gatekeeper is even stricter by default and some options are hidden (e.g. if you wish to allow all unsigned apps). For more infos: How to run Apps not from App Store in Sierra and Allows Apps from Anywhere in Sierra (if you need, there is also Add Gatekeeper Exceptions from Command line).
- Since OSX 10.12 (Sierra), an additional security mechanism has been added: "App Translocation", which applies to "downloaded" apps: their executable files are temporarily copied to a different path and run there, isolated from other files they may have been shipped with... to prevent even "signed" apps from running "unsigned" stuff contained in additional files. So, if you try to run OA after downloading and extracing it, it cannot access the required PK3 files and immediately shuts down.
Simplest solution is probably to first extract the ZIP file and then MOVE the whole OpenArena folder somewhere else (under /Applications or anywhere you prefer), because doing that removes the "com.apple.quarantine" attribute from the extracted files. Other solutions include using command line to manually remove the attribute from either the ZIP file (before extracting it) or from the whole OpenArena folder and its subfolders (if you already extracted it; example xattr -r -d com.apple.quarantine openarena-0.8.8/). See here and here for more infos. - OSX 10.15 (Catalina) removed the ability to run 32 bit programs on 64 bit Mac. As no official 64 bit OA Mac binaries are available yet, for the moment workarounds are not exactly great: you may use a virtual machine running a previous OSX version, Linux or Windows, or maybe use a software like CrossOver (which is paid software) for running the 32bit Windows OA binaries under OSX (untested!). Or maybe using a Linux bootable USB stick to run the Linux version, or maybe the free PlayOnMac software to try running the Windows version (untested!). There is an attempt to create 64-bit binaries for macOS happening here, and see also this issue.
- "Open Arena" version you can find in Mac App Store here is a third-party package, NOT an official release from OpenArena Team. We don't know which changes it has got from the official version. Official OA version is the one you can manually download from http://www.openarena.ws.
About OA 0.8.8 on Mac[]
About OpenArena v. 0.8.8, the 0.8.8 "full" (unified) package has been created using Windows, and Mac binares contained there lost some attributes required to execute them. This means that users have to use chmod command to set "+x" attribute to the openarena.ub file using:
chmod +x /path-of-your-oa-installation-folder/OpenArena\ 0.8.8\ r28.app/Contents/MacOS/openarena.ub
or
chmod +x "/path-of-your-oa-installation-folder/OpenArena 0.8.8 r28.app/Contents/MacOS/openarena.ub"
Example: chmod +x "/Applications/openarena-0.8.8/OpenArena 0.8.8 r28.app/Contents/MacOS/openarena.ub"
Alternatively, you can either download the 0.8.8 "patch" package, or download 0.8.8 Mac executables only, and copy the Mac binaries you find there into your installation directory, overwriting those that you previously extracted from the "full" 0.8.8 package (other files -most notably, Windows executables, Linux executables and pk3 files- from "full" package are OK, and you can use them directly).
Notes:
- 0.8.8 Mac binaries are those in "OpenArena 0.8.8 r28.app". Those in "OpenArena.app" are previous 0.8.1 binaries instead: they may be used (after chmod-ing them!), but do not include GLSL support and some other fixes.
- The note about running "unsigned apps" above still applies (OSX 10.7.5 and later)!
- A little tip... In OSX it is possible to drag a folder to command line: you may use this feature to automatically write the path of your OA installation folder into the command line, while typing the commands mentioned above.
- If you wish to use dedicated server binaries, you can apply the "chmod +x" command above also to the "oa-ded.ub" file (which is in the same folder as "openarena.ub" above). After doing that, you can launch the dedicated server from command line. Dedicated server binaries on OSX should work, but have not been extensively tested by us.
See also[]
- Download mirrors
- BitTorrent
- Manual
- Ports and markets: get the game through digital delivery platforms, or play it on more systems, such as Google Android, thanks to third-party ports.
Basic information[]
Game Menus[]

Single Player[]

Reset[]

Skirmish[]

Fight[]

Multiplayer[]

Specify[]

Create[]

Options[]

Setup[]

Player[]

Controls[]
Look[]

Move[]

Shoot[]

Misc[]

System[]
Graphics[]

Display[]

Sound[]

Network[]

Game Options[]

Defaults[]

Demos[]

Statistics[]
General[]

Weapons[]

Awards[]

Powerups[]

Mods[]

See also[]
- Manual
- Manual/ESC menu (explains how to use it and its options)
Heads up Display[]
Manual/Heads up Display
Gamemodes[]
See also: Gametype
Gamemodes (also known as gametypes) are the various different types of matches available in the game, each of which uses the game's mechanics with its own set of rules which determines what the goals are and how they must be achieved.
Some aspects of the game can be changed through special game options.
The match duration usually depends from the Time Limit and/or Frag/Capture Limit. The Time Limit is the maximum match duration, in minutes, while the Frag Limit is the amount of racked kills and the Capture Limit the amount of times a goal was achieved.
Overview table[]
These are the gametypes available in stock OpenArena 0.8.8. Mods may have different gametypes.
| G_gametype | Name | Team-based | In short |
|---|---|---|---|
| 0 | Free For All | No | Classic "deathmatch". Kill anyone in sight. |
| 1 | Tournament | No | 1 on 1 battles. Winner stays, loser goes to queue. |
| 2 | Single Player | No | Special gametype used for Single Player Deathmatch mode only (no Skirmish, no Multiplayer). |
| 3 | Team Deathmatch | Yes | Frag people of enemy team. Help those of your team. |
| 4 | Capture The Flag | Yes | Grab enemy flag and bring it to your own base. Recover your own flag if the enemy steals it. |
| 5 | One Flag CTF | Yes | Grab white flag and bring it to enemy base. |
| 6 | Overload | Yes | Heavily attack enemy obelisk, in order to destroy it. |
| 7 | Harvester | Yes | Kill enemies, then collect skulls and bring them to enemy base. |
| 8 | Elimination | Yes | Kill enemies until only one team remains with alive players. Items are removed from the arena. |
| 9 | CTF Elimination | Yes | Kill all enemies or capture their flag. Items are removed from the arena. |
| 10 | Last Man Standing | No | Kill all enemies until you only remain alive. Items are removed from the arena. |
| 11 | Double Domination | Yes | Keep possession of both checkpoints for 10 consecutive seconds. |
| 12 | Domination | Yes | Keep possession of checkpoints to earn points for your team. |
Gametypes[]
Free For All[]
Free for All (FFA), also termed as Deathmatch (DM), is a staple mode of the game where all players in a server fight to the death until either the time limit runs out, or a player reaches the frag limit. Each kill gotten earns the killer a frag, and suicide, be it from explosives, lava, fall damage, etc. takes away one frag. First player to reach the frag limit or to have the most frags when the time runs out wins.
Tournament[]
Also referred to as 1on1, 1vs1 or tourney, this game mode features a sequence of one on one battles where everybody else is spectating. The winner of the battle will stay for the next battle to fight the next combatant, while the loser will return to the waiting list.
The score table shows how many battles each player has won and lost (e.g. "2/1" means two battles won and one lost), on the left.
The number of points required to win each battle depends from Frag Limit.
Single Player Deathmatch[]
See also: Single Player Deathmatch
Singleplayer DM is very similar to regular FFA, except the player must climb up tiers across several maps, fighting against the bots that inhabit the preset matches as they go. Winning all 4 matches in a tier unlocks the next, and all medals obtained are saved.
Each map also has preset frag limits, usually due to the varying amount of combatants that may be present.
Team Deathmatch[]
In Team Deathmatch (TDM), players are assigned onto (usually) balanced teams, and must fight the opposing team in a similar fashion to regular FFA. The frags of all team members are clumped together, and the winner is decided with those frag counts.
In TDM, picking up a weapon again adds its full "basic" amount of ammo also if you already had it (in other modes, if you already had a weapon's basic amount of ammo, picking up that weapon again gives you one more shot only). All weapons respawn after 40 seconds by default, unlike other modes where they respawn after 5 seconds.
The machinegun weapon does a little less damage than in all other game types (5 hp per bullet instead of 7); also players spawn with only 50 ammo for it, unlike the usual 100.
In this mode it is advisable to turn friendly fire on, to force players to pay more attention to their teammates than in other team-based modes (killing a member of one's own team lowers one's individual score, and thus the team's total score too).
Number of points required to win the match depends from fraglimit.
Capture The Flag (CTF)[]
Players are put onto balanced teams and have to either defend their own flag, or go attack the enemy to try grabbing theirs, and when caught, they must bring the enemy flag back to their own to score a point.
If your flag is not present at your base, you cannot capture, which is usually why it's best to go after the enemy carrying your flag. Be careful, as some other enemies might be guarding their flag carrier.
The match ends when the Time Limit or Capture Limit is reached. Individual scores are shown in the score table: a player can get individual points when doing some actions, please refer to Appendix of this page for more info.
The only way to win in this mode is by capturing flags, so CTF involves a lot of team cooperation in order to achieve the victory.
One Flag Capture[]
See also: One Flag Capture
One-Flag Capture is similar to CTF, except in that there's one flag in what's usually the center of the map, and to score, you have to bring it to the ENEMIES' flag. Unlike regular CTF, it's usually a much better idea to bring more people with you when going for the flag. One person versus dozens more is always a difficult fight.
Overload[]
In Overload (also known as Obelisk) each player is assigned to one team - red or blue.
Each base has an obelisk. The obelisk has a lot of health (default 2500) and health regeneration.
Team points are earned by destroying the enemy obelisk.
Be aware that the enemy will attack your obelisk too.
Number of points required to win the match depends from Capture Limit.
Harvester[]
In Harvester (also known as Skulls), each player is assigned to one team - red or blue.
Killing a blue player spawns a blue skull, and killing a red player spawns a red skull. Skulls spawn at the skull generator, usually at the middle of the map.
You can collect skulls of the enemy's team color, and you can carry more skulls at once. Touching a skull of your team color will make it disappear, preventing the other team from grabbing it. Skulls disappear when the skull carrier is fragged (they are not dropped).
Your current skull load quantity is shown in your HUD; other players will see your skulls floating behind you.
Running over the enemy skull receptacle will give your team a point for every skull you are carrying.
Number of points required to win the match depends from Capture Limit.
Elimination[]
See also: Elimination
Two teams. You begin with all "standard" weapons and prefixed health and armor. There are no items to pickup. When you get killed, you will have to wait the end of the round. The team which eliminates the whole other team wins. Also known as Clan Arena.
Number of points required to win the whole match depends from Capture Limit (your team earns a point for each round it wins; a team will need to win by at least 2 rounds).
CTF Elimination[]
See also: CTF Elimination
Similar to Elimination mode, but with Capture the Flag rules added to it.
You can score by capturing enemy flag or by eliminating enemy team.
Number of points required to win the whole match depends from the Capture Limit.
Last Man Standing[]
See also: Last Man Standing
Free for All with a bit of Elimination in the mix; everyone kills everyone until one is left standing to get a point. First one to a frag/capture limit or the one to have the most points when the timer ends wins.
Double Domination[]
See also: Double Domination
Two teams. Your team has to keep the control of both checkpoints in the map for 10 consecutive seconds in order to score.
Number of points required to win depends from the Capture Limit.
Domination[]
See also: Domination
Two teams. Each team has to get and mantain control of some checkpoints in order to gain points.
Number of points required to win depends from the Capture Limit. This should be set to a much higher value than usually used for other gametypes (e.g. 500 instead of 8).
See also[]
| Appendix available |
|---|
|
This page has got an "Appendix" sub-page, which may contain useful extra infos, such as console commands related with the features mentioned in this page, or hints for better usage. After reading this page, don't miss to give a look to its "Appendix", too: |
Medals[]
Medals are simple "awards" that you earn by doing some particular things.
These medals are shown and announced in-game in the moment when you get them. When a player gets one of them, the relative icon will appear over his head for a while. This happens in any matches you play.
For most of them, when you will achieve one, you will see its icon on-screen, and hear the annoucer saying its name, but some are only shown at the end of a Single Player Deathmatch game. Some are shown for a while over the head of the player that gets them. Some of them are stored and shown in the Single Player Deathmatch menu, while others are stored and shown in the Statistics menu, depending from which they are, and in what game mode/against who you get them.
Those of them that you get in Single Player Deathmatch mode (and only in that mode!) are also shown when the match ends, and are stored and shown in the "Single Player Deathmach" menu everytime you enter it.
Those obtained when playing in Multiplayer mode are instead stored under the "Statistics" menu, but only those obtained against human players. Those obtained when playing in Skirmish mode are not stored.
Medals[]
| Excellent: Given when the player gains two frags within two seconds. | |
 |
Gauntlet: Awarded when the player successfully frags someone with the gauntlet. |
 |
Impressive: Given when the player achieves two consecutive hits with the railgun. |
| Perfect: Achieved when the player finishes one match without dying. Quite hard to get at high skill levels. Single Player Deathmatch only. | |
| Accuracy: Awarded when more than the half of player's shots of the whole match have hit other players. Single Player Deathmatch only. | |
 |
Frags: Achieved each time the player racks 100 frags, 200 and so on... Single Player Deathmatch only. |
 |
Assist: Achieved when you return your flag within ten seconds before a teammate of yours makes a capture. Base-based gametypes only, doesn't appear in SPD. |
 |
Capture: Achieved when the player scores capturing the flag. Base-based gametypes only, doesn't appear in SPD. |
 |
Defend: The "Defend" or "Defense" medal is achieved when you kill an enemy that was inside your base, or that was hitting a team-mate of yours that was carrying the flag. Base-based gametypes only, doesn't appear in SPD. |
See also[]
- Manual/Statistics
- Single Player Deathmatch
- Killing Sprees, Death Sprees and Multikills
- Additional notes for this page
- Manual/Graphic options#Draw rewards
- Manual/Graphic options#Accuracy overlay, in case you are interested into knowing your per-weapon accuracy during a match.
External links[]
- Quake III Arena Guide - Medals on PlanetQuake (Internet Archive)
| Appendix available |
|---|
|
This page has got an "Appendix" sub-page, which may contain useful extra infos, such as console commands related with the features mentioned in this page, or hints for better usage. After reading this page, don't miss to give a look to its "Appendix", too: |
Items[]
There are many different items you can find around the arena, and you may find them very useful.
Some kinds of items are dropped when the caracter owning them dies. In base game you cannot drop any item you have, unless you die, but some mods may include additional commands to drop some kind of item.
Most items in OpenArena come from Quake III Arena, plus some which come from Team Arena and are not available in most old mods.
Tip: learning where the items and the weapons will spawn, and the right timings to grab them before your oppents do it, is an important technique (in this case, tactic) known as control (item control, resource control).
Note: if you are searching info about the weapons in the game, please read Manual/Weapons. For other things in the maps that you can interact with (flags, obelisks, bouncepads, doors, lava, etc.), please read Manual/Map elements.
Health bonuses[]
When your health reaches 0, your character will die. You will usually enter a match with a health value of 125, it it will slowly go down to 100. If you get bonuses and you health goes over 100 (which may be referred as overhealth), it will slowly go down to 100 again. If you set an handicap, your maximum health level will be lower. Some gametypes and special game options manage the health differently.
Health pickups respawn after 35 seconds, except Megahealth which respawns after 40; the mapper can change this.
Green health[]
- Green health bonus (a.k.a. "5 health", "+5" or "small health") : gives you 5 health points, even beyond the value of 100 (up to 200).
Yellow health[]
- Yellow health bonus (a.k.a. "25 health", "+25" or "health"): gives you 25 health points, up to the maximum of 100.
Gold health[]
- Gold health bonus (a.k.a. "50 health", "+50" or "large health"): gives you 50 health points, up to the maximum of 100. With cg_simpleItems 1 it is a red plus symbol.
Megahealth[]
- Megahealth (a.k.a. "blue health bonus", "mega", "+100 health" or "+100"): gives you 100 health points, up to 200.
Armor bonuses[]
You will usually enter the game with no armor. If your armor gets over 100 (which may be referred as overarmor), it will slowly go down to 100. If you set an handicap, your maximum armor level will be lower. Some gametypes and special game options manage the armor differently.
Armor pickups respawn after 25 seconds; the mapper can change this.
If you have enough armor, it does absorb 66% of the damage you get, while the remaining 34% affects your health. When you run out of armor points, all the remaining damage directly affects your health. If your health reaches 0, not counting how much armor you still have, your character dies.
Armor shard[]
 |
Armor shard (green shard): gives you 5 armor points, even beyond the value of 100 (up to 200). |
Combat armor[]
 |
Combat armor (yellow armor), also known simply as armor: gives you 50 armor points, up to 200. |
Heavy armor[]
 |
Heavy armor (red armor), also known as body armor: gives you 100 armor points, up to 200. |
Power-ups[]
These are items that are immediately effective when you grab them, and their effect is limited in time (a timer appear on the bottom right corner of the screen). These powerups usually last for 30 seconds (but the map creator can change their duration); if the player that holds the powerup becomes killed, it will be dropped and another player may take it and use it for its remaining time. It is possible to have more of them at the same time; if a player gets two of the same kind before the first one expired, the total duration of the second one will be added to the residual time of the first one.
Power-ups respawn after 2 minutes; the mapper can change this. After a gamestart power-ups appear sometime between 0:30 and 1:00 for the first time.
Battle suit[]
- Battle suit (sometimes also known as Environment suit): complete protection from drowning, lava, slime, splash damage from weapons (e.g. you may step over proximity mines without fear) and normal falling damage. Also cuts normal damage in half. It allows you to perform rocket jumps without getting damage. If you encounter a player that holds it, remember that the usual tactic of firing rockets at his feet will not work at all, unless you get a direct hit. Its user is surrounded by a yellow/orange glow.
Flight[]
- Flight: a flight pack that allows the carrier to fly. You cannot gain speed by strafejumping while carrying it, and jump-pads do not "push" you. By default this item lasts for 60 seconds.
Speed[]
- Speed (also known as Haste): increases your movement speed and fire rate by 30%. While running with it, you leave a trail of small dust clouds behind you.
Invisibility[]
- Invisibility: makes you almost completely invisible, thus it will be difficult for other players to see and aim at you. If you get both this and quad damage powerup, the blue light caused by quad will still be visible on the ground. Speed powerup dust clouds will still be visible, too.
Starting with OpenArena 0.8.8, an optional dmflags value allows to make the model of the player holding the item totally invisible, instead of almost invisibile as usual.
Quad damage[]
- Quad damage (quad for short): the damage caused by your weapons (including to yourself, be careful!) will be multiplied (by 3 by default, customizable with \g_quadfactor variable).[1] Any player holding it becomes very dangerous. Its user is surrounded by a blue glow (red glow if the player is part of the red team), plus it emits a blue light visible on the ground under him.
Regeneration[]
- Regeneration: your health will slowly and automatically regenerate, up to 200. While holding it, you will slowly "blink" with a red glow appearing for a while around you.
Holdable items[]
Also called "portable items", "carried items" or "useable items", you can hold only one of them at once. After you get one, you will activate it by pressing a specific key (usually, ENTER; custominzable from Setup -> Controls -> Misc menu).
Holdable items respawn after one minute; the mapper can change this.
Medkit[]
- Medkit, or Portable medkit: when activated, it will immediately bring your health to 125.[2] If your health is already higher than the value medkit would give you, it is not possible to activate the item. If you are equipped with the "guard" rune, medkit gets boosted: in that case, medkit would bring your health up to 225 HP!
Personal teleporter[]
- Personal teleporter: when activated, it will immediately transport you to a random spawnpoint somewhere in the arena. It can be used as an emergency escape device. If you were carrying a flag, you will lose it.
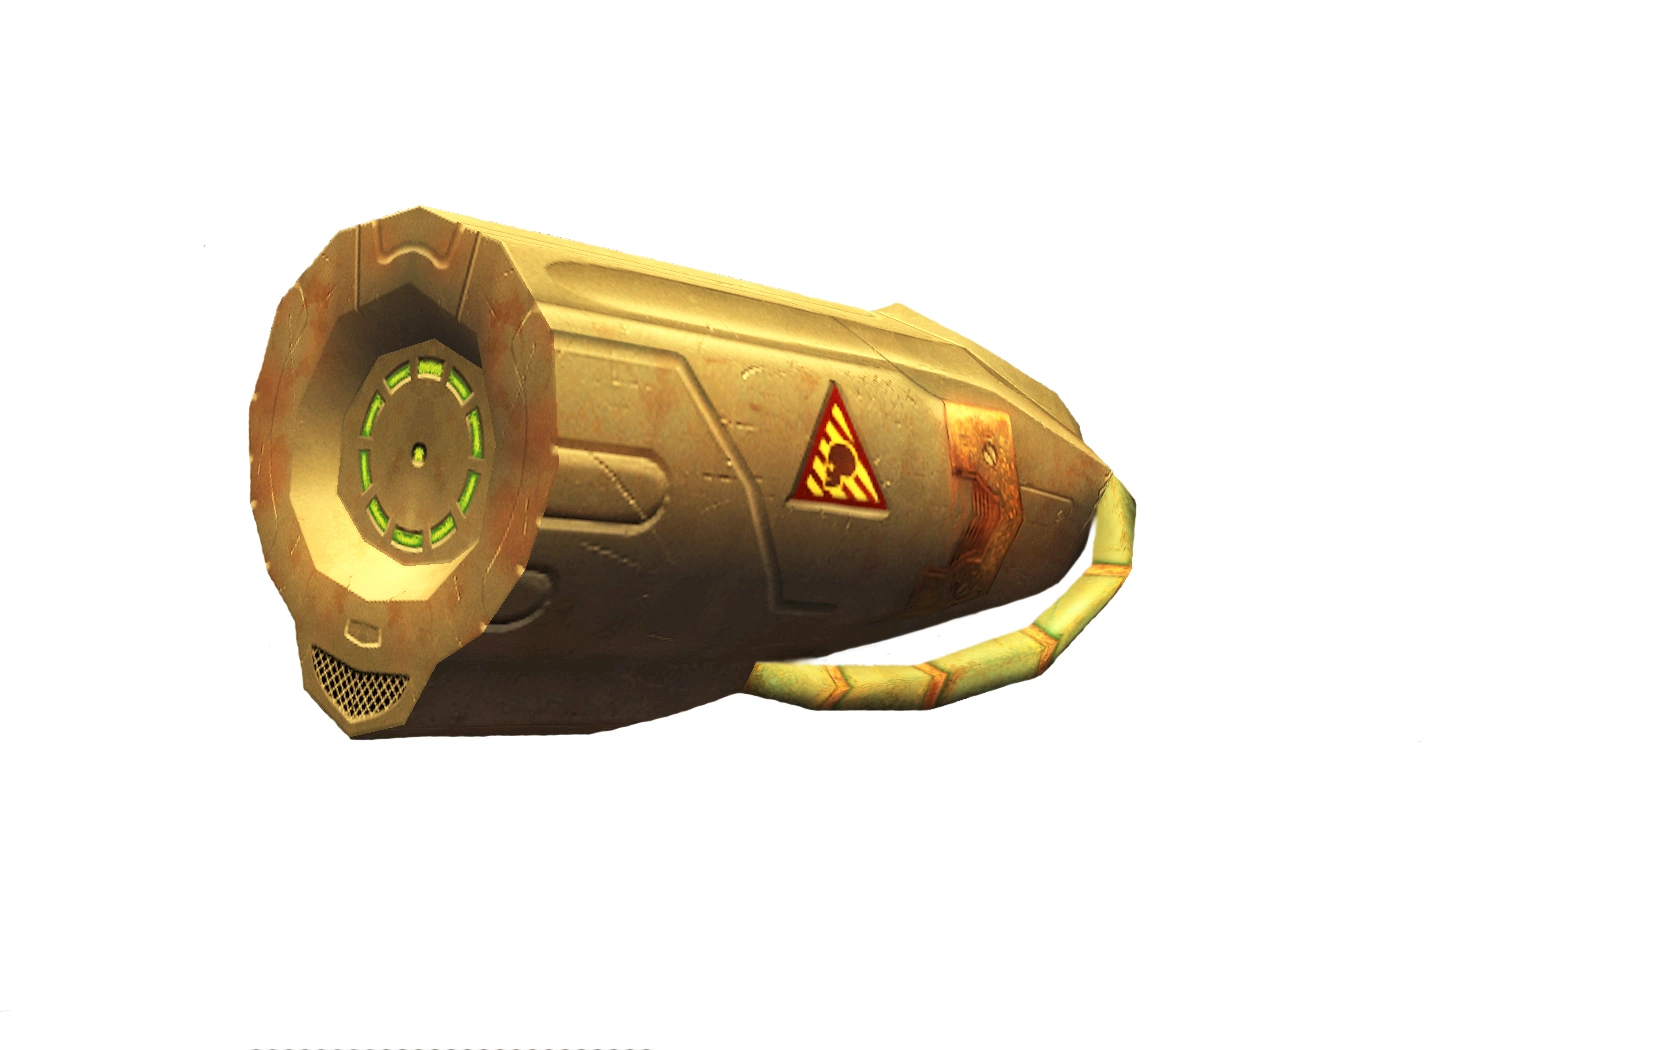
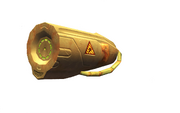
Kamikaze[]
- Kamikaze: when activated, your character will suicide with a big explosion, killing himself and probably the enemies in the area. If a player dies while holding the kamikaze without activating it and the body is still intact, an icon will appear above the corpse and if the corpse is not "gibbed" (reduced into pieces) within 3 seconds, the explosion will be triggered.[3] The item ignores the friendly fire settings and will damage allies too. The shock can be felt by anyone in the arena (movement is affected, screen shakes). This item comes from Team Arena.
Invulnerability[]
- Invulnerability: when activated, an energy shield will surround the user, that will not be able to move (including falling or being pushed: the energy sphere may float mid-air, where it has been activated; be aware that momentum is not kept, and thus you will fall vertically when the energy sphere disappears) until its effect disappears; he can however look around. The effect lasts about 10 seconds. He will be able to shoot from inside to outside the shield, while the other players shots (except proximity mines) will not be able to penetrate it and will be reflected away. A single proximity mine entering the sphere (his own do not count) would kill the invulnerability user, that would explode in a bubble of blood (also known as "the juiced effect"). OpenArena versions up to 0.8.5 lacked the 3D model and all graphic effects for the item, that is completely working in 0.8.8 instead. This item comes from Team Arena.
Runes[]
"Runes", also known as "Team Power-ups", "Permanent Power-ups", "Persistent Power-ups" or "Permanent runes", are special items that were first introduced in Quake III: Team Arena (thus, are not supported in most other old mods designed for Q3).
They are "permanent" because, after you get one, you will have it until you die. They are "team" because usually you can get only the ones dedicated to your team (usually, those you find in your own base), but this depends from the map creator (you can take a look here, here and here). A player can have only one of them at once, and to have more players with the same rune at the same time, there must be more spawn points for it.
In the "base" OpenArena, they are disabled by default, but you can enable them, if you wish, using the g_runes variable (0=disabled, 1=enabled). They are always used instead in The Mission Pack mod (at the time of this writing, the one you find bundled with OpenArena 0.8.8). G_runes variable has been added by OpenArena 0.8.5: up to OpenArena 0.8.1, runes were never shown in baseoa (the main game), but in Missionpack and Team Arena mods only (mods based upon OA 0.8.5 and later gamecode, instead, should follow your g_runes value). Runes do not spawn in Double Domination mode.
"Ammo regen" is thought for players defending the base, while "Scout" and "Guard" are for players attacking the enemy base and "Doubler" is good for both attack and defense. Anyway, you can use them the way you prefer.
Since the only way to release one of these permanent powerups is to die, one may have to ask a team-mate to commit suicide (using \kill command or in some other way), in order to let another player get that specific rune from its spawning point.
Before picking them up, they are easily identified due to appearing as floating alphabet letters. When a player holds one, a "text belt" turns around him (he's surrounded by the name of his rune): reading the text is not so easy during a gunfight, so it's advisable to learn each rune distinctive color, to quickly understand which one your opponent is wearing.
Your HUD shows the letter of the rune you are holding, if you have one. Team overlay feature also indicates runes your team-mates are equipped with.
Doubler[]
- Doubler, identified by a "D", doubles the damage caused by your weapons (including self damage). Absolutely devastating if used together with quad damage. Color: crimson (red)/pink.
Ammo regen[]
- Ammo regen, identified by a "A", automatically regenerates your ammo for the weapons you have, up to a certain level for each weapon. And it increases the fire-rate a bit (regeneration rate is slower than fire rate). Color: orange/yellow.
Scout[]
- Scout, identified by a "S", increases movement[4] and firing speed, but prevents you from wearing any armor. Color: "icy" light blue/light green.
Guard[]
- Guard, identified by a "G", instantly gives you 200 health and 200 armor, and then automatically regenerates your health, slowly up to 200. Your armor level will not go slowly down to 100 as usual. When having "guard" rune, using portable medkit would bring your health up to 225! Color: blue/purple (violet).
Other items[]
There are some more items you can pick-up.
- Weapons, obviously. Please read Manual/Weapons for info about them. You can also pickup the weapon lost by a killed character.
- Ammo boxes. Useless if you don't have the corresponding weapon yet, but very useful to do not run out of ammo.
- Gametype-related items. In some particular gametypes, you will have to transport flags or skulls: please read Manual/Map elements#Gametype-related items for more info.
Notes[]
- ↑ Why a "quad" name with a "triple" damage, you ask? Well, you have to consider that "quad damage" was a distinctive powerup for the Quake game series (the symbol of the powerup, in those games, was a stylized "Q", derived from the symbol that identified the whole game); Quake 1 and Quake 2 were primary "campaign" single-player games againts quantities of monsters (where the firepower is never enough, and x4 damage was good); for Quake 3, being a deathmatch-based game, iD Software chose to balance things changing damage to x3, but keeping the distincitive name, even if a bit misleading. In OpenArena, its symbol is no more a "Q", but the name is still the same for compatibility reasons. G_quadfactor holds fractonary values (e.g. setting it to 1.5 will cause "quad damage" user to make only 1.5 times normal damage). G_quadfactor should be kept to "sane" values: excessive values (anything above 6, maybe?) may make the player really too powerful, while fractions below 1 (e.g. 0.5) would make the "quad damage" player cause less damage than standard players (and negative values would even cause weird knockback effects).
- ↑ If you are using handicap, the actual value will be lower.
- ↑ If the server has got /com_blood 0 (default value is 1), it is not possible to gib corpses, thus it is not possible to prevent the Kamikaze explosion. See also Manual/Graphic options#Blood and gibs.
- ↑ Even faster than Speed powerup. Having both "Speed" and "Scout" at the same time does not further accelerate your moving speed than the Scout speed.
See also[]
External links[]
- Quake III Arena Guide - Items on PlanetQuake
- Quake III Team Arena Guide - Weapons and Items on PlanetQuake
- Quake III Team Arena Guide - Powerups on PlanetQuake
Weapons[]
OpenArena features 12 different weapons, plus the offhand grapple. Each weapon has got its own distinctive features. Gaining experience with all of them, and choosing the right one at the right moment, may result very useful for you.
This page explains them, as they work in the main game. Be aware that some mods may vary weapons behavior in various ways, or may even add completely new weapons. Also, be aware that old mods might not feature the newer stuff included into baseoa, such as the Missionpack weapons and other options introduced across OA's release history. Likewise, mods may feature options which aren't present in OpenArena. For these notes, check the appendix.
Useful things to know about weapons[]
Weapon design is changed from Quake III Arena, but they work the same way.
Each weapon has got an unique fire type.
You can find weapons and their related ammo boxes (a.k.a. "ammo prisms") around the arena.
If you are playing with simple items option enabled, you can still distinguish weapons from ammo pickups due to the fact ammo icons have got a border that recalls ammo prisms.
Killed players may drop their weapon, allowing other players to pick it up.
Important: the autoswitch weapons feature makes your character automatically choose the weapon you just picked up, and you may wish to select the autoswitch mode you prefer or to completely disable it, according to your taste. OpenArena 0.8.8 added some new autoswitch modes which are not supported while playing with old mods.
Usually you enter the game with the gauntlet and the machine gun only, but some maps allow you to spawn with other weapons in your inventory. In Elimination, CTF Elimination and Last Man Standing modes, instead, all items are removed from the map and the starting weapons and ammo are set by the server admin.
You can choose a weapon by scrolling your weapon inventory with the keys assigned to the "Previous weapon switch" and "Next weapon switch" actions, or by pressing the corresponding key assigned to the corresponding weapon. Mouse wheel is usually used for scrolling weapon inventory. See also Manual/Controls page.
Most weapons are divided into "hitscan" and "projectile" categories. "Hitscan" are "instant-hit" weapons: targets on their trajectory are immediately reached: the only defense against them is to move quickly or unpredictably to make it difficult for the shooter to correctly aim (of course, attacking him first is another option). "Projectile" weapons actually shoot bullets that fly in the air at visible speeds: these can actually be dodged by the attacked player after they have been fired; projectile speed is not influenced by the speed you were moving when you fired it.
Various weapons are capable of damaging more players with a single shot, due to firing more "pellets" in a single shot, or due to explosive projectiles.
Weapons can cause either "direct" or "splash" damage to each opponent. "Direct" damage is the normal damage caused by a direct hit; "splash" damage is the damage usually caused by an explosion, within a certain radius around the point of the detonation. The Battle Suit item is able to provide its user with protection from splash damage.
When you hit an enemy, directly or indirectly, you hear the "hitsound" beep.
Rocket launcher, Plasma gun and Grenade launcher weapons may also be built in maps a "shooters": traps that fire when activated by some kind of "trigger".
Tips:
- Armor, if own, absorbs 66% of damage. For more infos, see Armor.
- For info about other items you can pick-up, please read Manual/Items. For other things in the maps that you can interact with, please read Manual/Map elements.
- OpenArena introduced some options to customize your weapon bar (weapon inventory) look: take a look to Manual/Graphic options#Weapon bar.
- Switching from a weapon to another one requires a little time (and if you just fired, the change will be done only after the current weapon reload time). It is a quick operation.
- OpenArena supports a latency compensation feature for instant-hit weapons, which may not be supported by most old mods, or may be implemented differently there. Please read delag hitscan for infos about the feature.
- Many other useful notes about weapons (e.g. useful for fine-tuning, troubleshooting, mods that alter weapons behavior or focused on a specific weapon, extra infos about some weapons) are available under Manual/Weapons/Appendix page.
Vanilla OpenArena weapons[]
These are the weapons from the original Quake III Arena. In OpenArena, their look is different than in Q3A, but they work the same way. [1]
Gauntlet[]


- The gauntlet is a mêlée weapon which combines a whirling saw blade with a deadly electrical charge.
- It is used for close combat only, and one hit inflicts 50 damage.
- When a gauntlet kill is achieved, the killer earns a gauntlet medal and both the killer and the victim hear the "humiliation" sound.
- It is normally a last-resort weapon, but is also useful in narrow corridors and doorways.
- It does not need ammo.
- Important: unlike other weapons, gauntlet is not selectable by scrolling your weapons inventory with the mouse (to avoid unintentional selection), but you have to press the proper key ("1", by default) to select it instead.
Machine Gun[]


- The machine gun is the other weapon that the player starts out with. Usually, all players start with 100 ammo for it, except Team Deathmatch mode where they start with 50 bullets. It is a hitscan weapon (instantaneous impact) that can rapidly inflict small amounts of damage (7 hp per bullet, 5 hp in TDM) and has a small degree of spread (approx. 2 degrees).
- Not extremely deadly, but useful, for example, to finish an already weakened opponent who's running away.
- The machinegun has a rate of 10 shots per second.
- Ammo box name: Bullets
- Weapon number: 2
Shotgun[]

- The shotgun is primarily used for close range combat since its large spray makes it almost useless at long distances.
- The shotgun shoots 11 pellets that deal 10 damage each, so a concentrated spread can kill an unarmoured player.
- Like the machine gun, it is an instant impact weapon.
- The shotgun is found on almost every stock map.
- To mitigate its high damage it has a one second delay between shots.
- Ammo box name: Shells
- Weapon number: 3
Grenade Launcher[]

- This weapon fires grenades that detonate either on contact with another player or 2.5 seconds after being launched.
- Grenades cause up to 100 HP of direct or splash damage.
- Grenades will not detonate as a result of contact by the one who launched it and are not obstructed by them, however they may get up to 50 HP damage due to being too near at the moment of the explosion.
- In comparison to the rocket launcher, although the splash damage radius is a bit bigger, more ordnance (or skill, or luck) is usually required to inflict similar damage due to the grenade's short-range arc and bounce unpredictability (making it hard to score a direct hit).
- Grenades ability of bouncing on walls can be used to shoot around corners in narrow corridors, e.g. when trying to escape from a chaser.
- Grenades can be successfully thrown in the middle of a fray (better if from outside of it, to avoid self damage), but remember that blindly throwing grenades you may easily hurt or kill your own team-mates, if friendly fire is active!
- It fires at a rate of 0.8 seconds.
- Ammo box name: Grenades
- Weapon number: 4
Rocket Launcher[]

- The rocket launcher can inflict a lot of damage with little aim as the rocket impacts cause a lot of splash damage.
- Because of its wide blast radius, players are encouraged to shoot the ground, wall, or ceiling, rather than aim for the opponent directly (rockets explode on first impact with players or solid map elements).
- This however becomes a double-edged sword at closer ranges; at point blank range the player could significantly harm or kill themself if they are careless (maximum possible damage it may cause to its own user is 50 HP).
- A direct hit on an opponent deals 100 damage, but in that case splash damage cannot be added to the victim.
- This weapon can also be used to rocketjump, taking advantage of the player's own blast to reach even higher heights than regular jumping.
- Together with the Railgun, this is one of the most beloved weapons in the game.
- Ammo box name: Rockets
- Weapon number: 5
Lightning Gun[]

- The lightning gun (also referred as the shaft or thunderbolt) is much like the machine gun, it directly impacts a destination, but it fires a beam with limited range (768 units).
- It can kill a healthy and armored opponent in less than two seconds because it shoots at 0.05 seconds per pulse, which makes 8 points of damage.
- The lightning gun makes a unique noise when selected, even when not active. Opponents in close range might hear it, alerting them of your presence and of your selected weapon.
- If you feel the beam follows your aim too slowly, see Manual/Graphic_options#Straight lightning gun beam.
- Ammo box name: Lightning
- Weapon number: 6
Rail Gun[]
- The railgun is primarily used for long range combat or sniping (although its range is not infinite: there does exist a distance limitation, however it's only relevant in really large maps).
- It is 100% accurate, inflicts 100 damage but has a low fire rate (default 1.5 seconds).
- The railgun makes a unique noise when selected, even when not active. Opponents in close range might hear it, alerting them of your presence and of your selected weapon.
- Although firing only a single pellet and not having splash damage, you may sometimes hit more characters with a single shot due to RG slugs going through bodies!
- Noticing beam traces can be useful to find snipers.
- You can customize the color of your own railgun beam from Player settings menu.
- Two consecutive railgun hits will make you earn the "Impressive" medal.
- OpenArena includes an instantgib game option, where all the players start with a special railgun, which kills in one hit.
- Ammo box name: Slugs
- Weapon number: 7
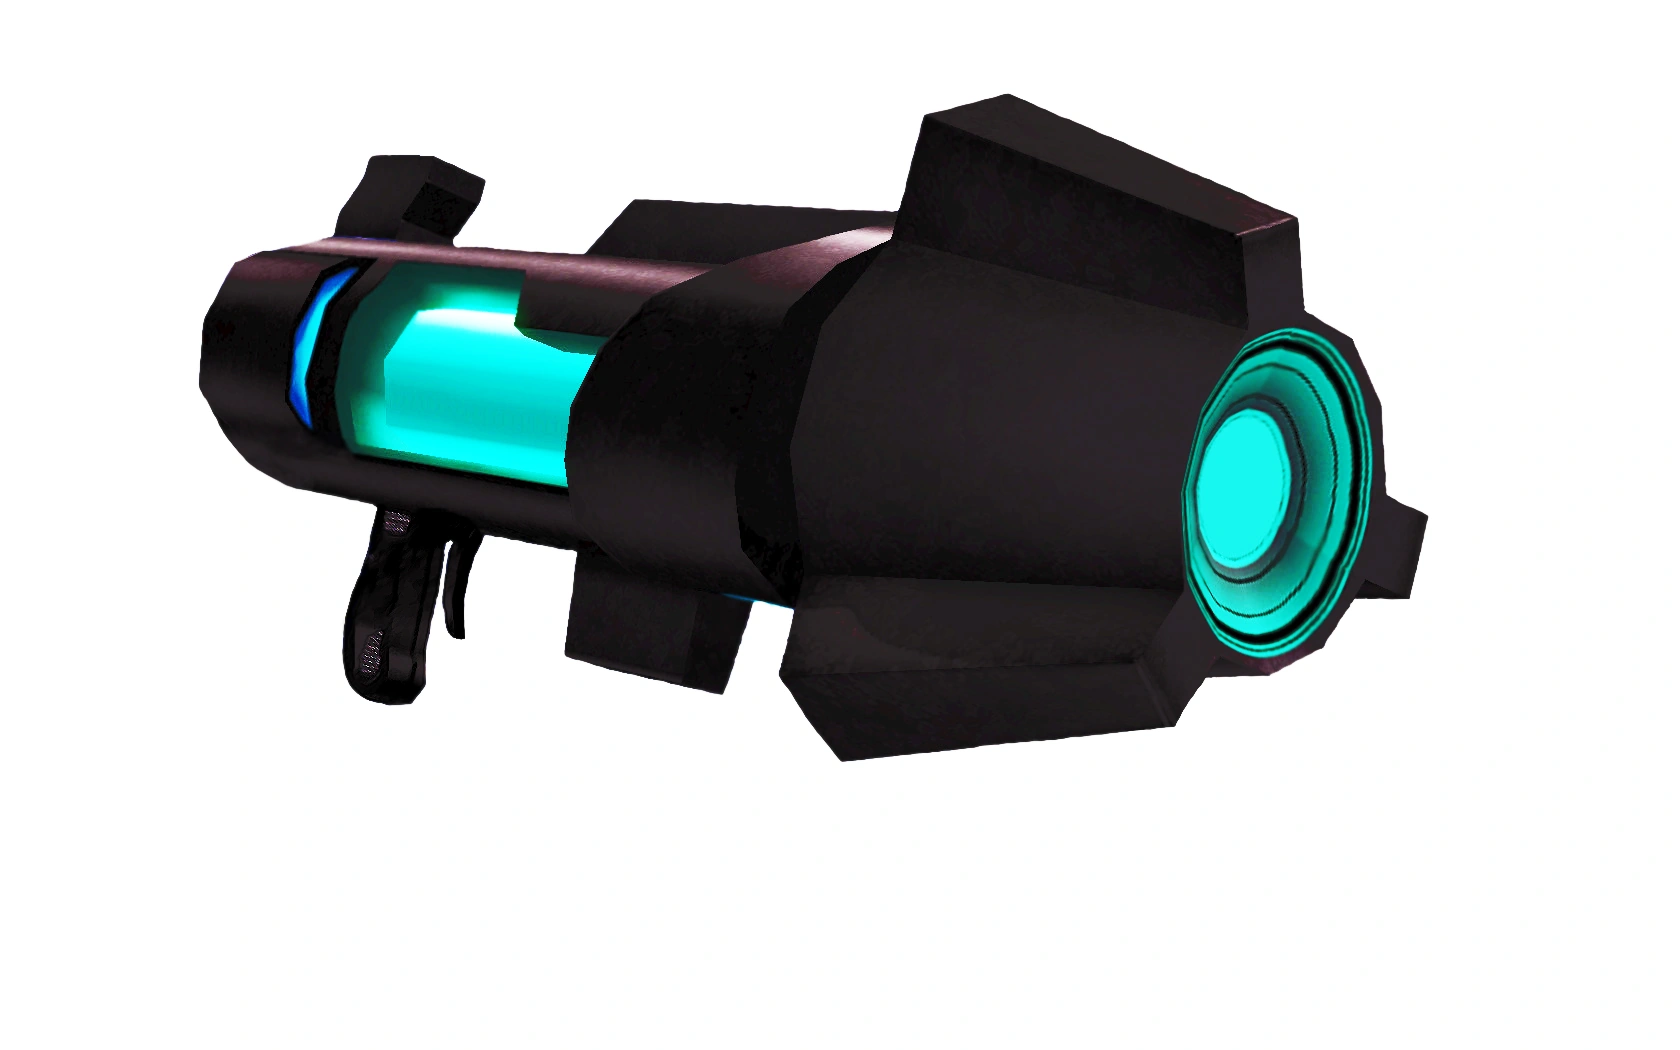
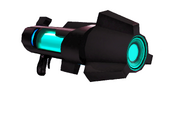
Plasma Gun[]

- The plasma gun is an effective weapon for close to medium range combat.
- It rapidly fires a stream of deadly plasma pulses (10 per second) which inflict a significant amount of damage (20 hp per orb).
- The fast-traveling bursts however are not instant impact like the machine gun.
- The plasma also inflicts minor splash damage (with a small radius), which can actually be used to "plasma climb". But, because the power of the splash damage is small, plasma climbing is slower than rocket jumping, cannot gain as much height, and requires more skill. More details about plasma climbing are under the Techniques page.
- Ammo box name: Cells
- Weapon number: 8
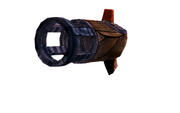
BFG10K[]
- BFG10K is considered the ultimate weapon.
- A rapid-fire weapon, firing out fast-moving explosive plasma at a rate of about 5 shots per second, which inflict direct damage or splash damage 100 hp per cell.
- In effect, BFG10k is a rapid-fire Rocket Launcher with faster projectiles and other than the name it shares little in common with the first famous BFG weapon.
- The BFG10K makes a unique noise when selected, even when not active. Opponents in close range might hear it, alerting them of your presence and of your selected weapon.
- It's so powerful that many maps do not include it, or make it difficult to get it, to not ruin the gameplay with excessive use of it.
- As with the rocket laucher, using it for short range combat (e.g. in small rooms) may be risky: its splash damage may cause up to 50 HP damage to the BFG user.
- Ammo box name: Bfg Ammo
- Weapon number: 9
Missionpack additional weapons[]
These weapons are originally from Quake III: Team Arena. They can be found in standard OA too, so learn to use them.
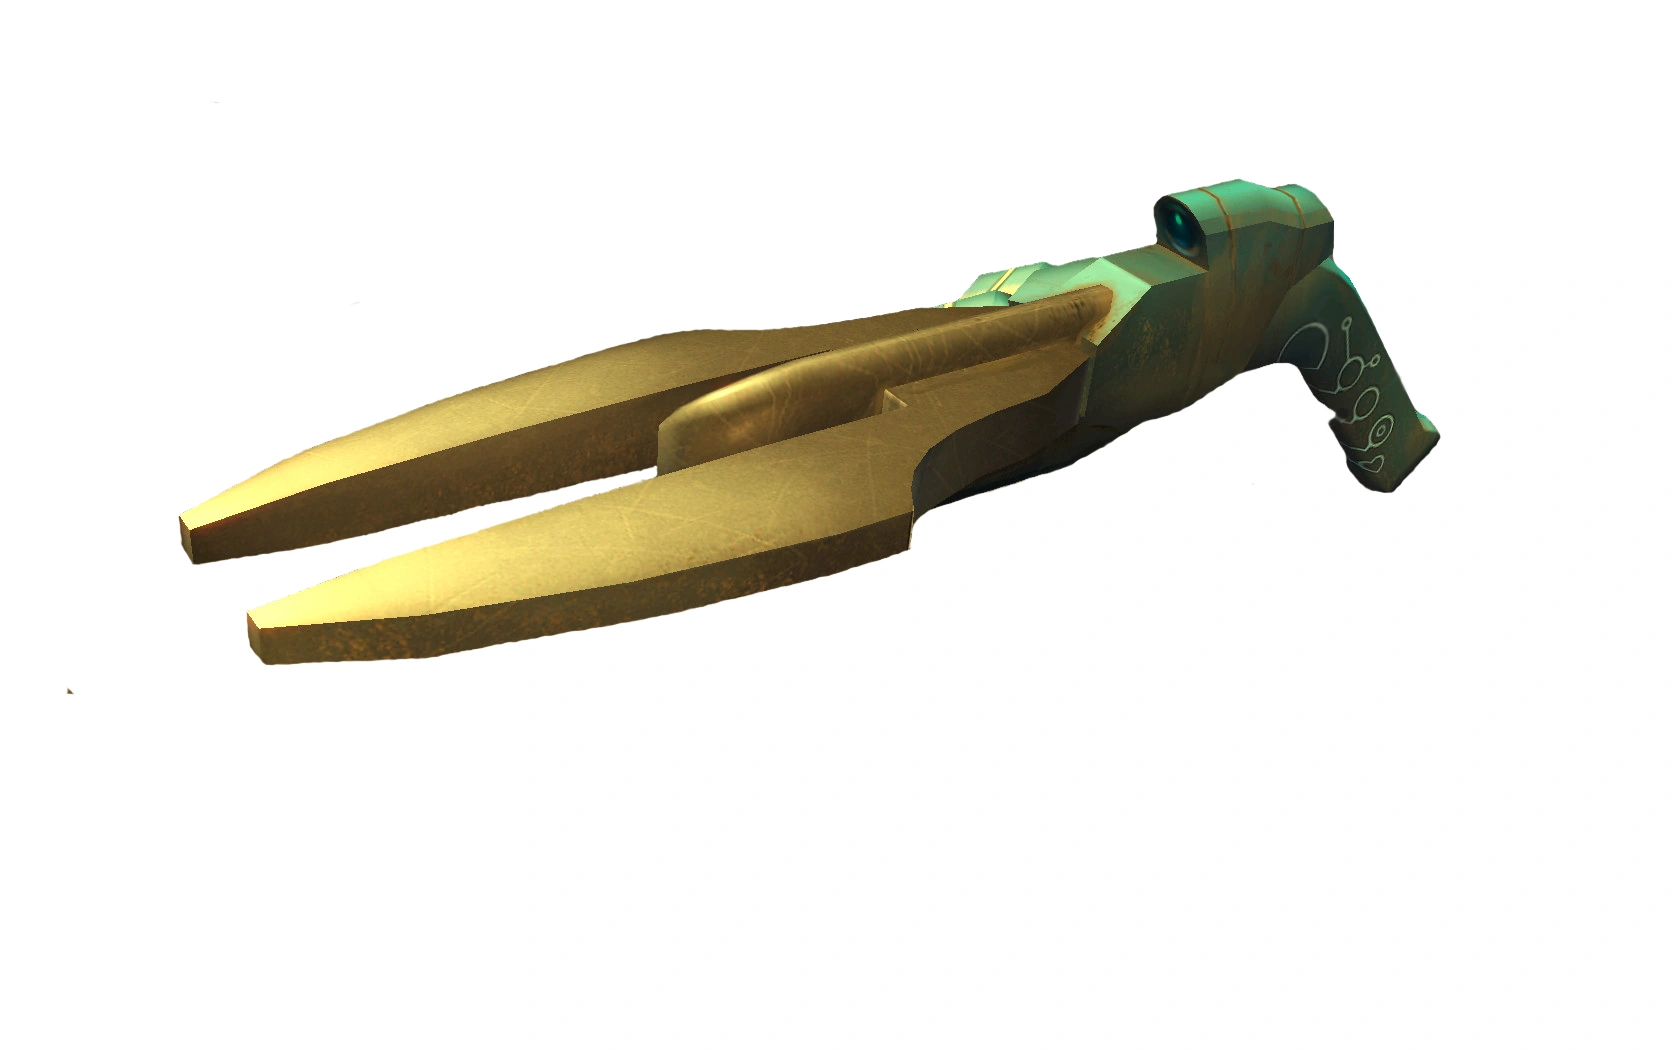
Nail gun[]

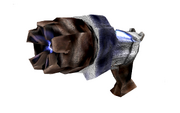
- Fires a wave of 15 nails that fly in the air and hurt 20 HP each, potentially an enormous amount of damage (300 points!).
- However, it is a bit slow.
- Very deadly at close range, its smaller spread may make it more adapt than shotgun for medium range, however it's not so easy to hit moving targets.
- Ammo box name: Nails
- Weapon number: 11
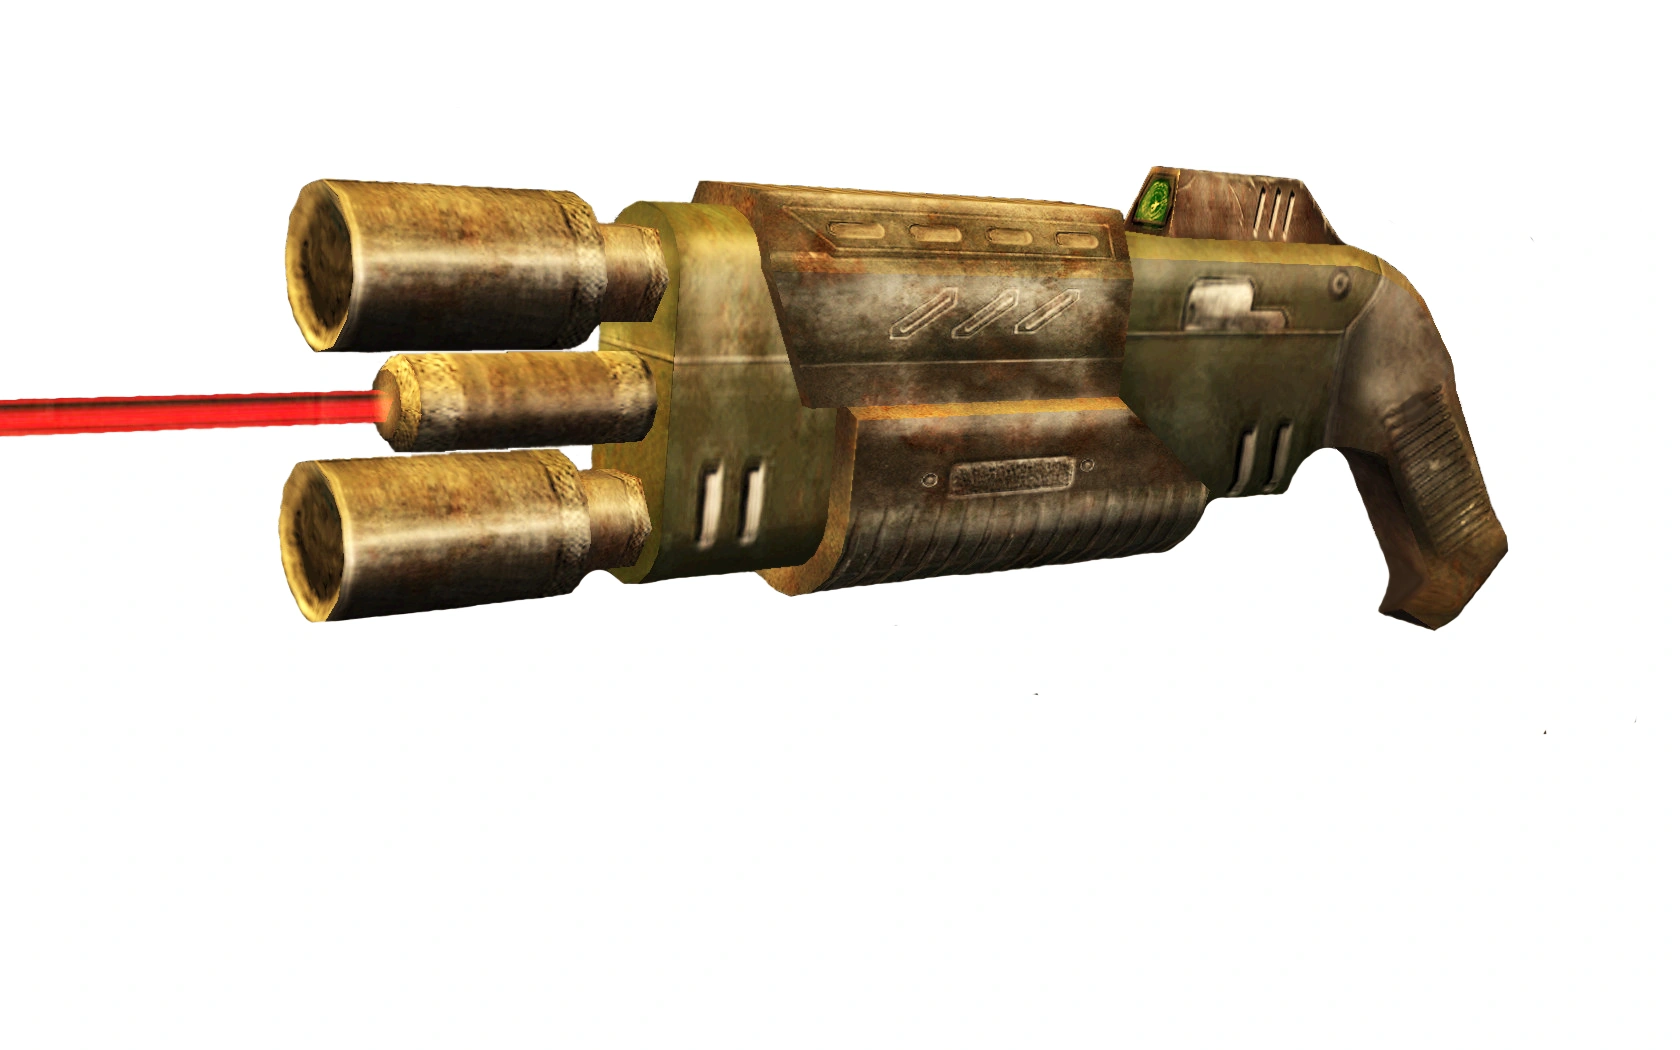
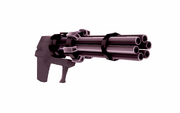
Prox mine launcher[]

- Launches proximity mines (a.k.a. adhesive mines or sticky mines) that stick to the ground, wall, ceiling or even to other players.
- They will explode if enemy is close, are hit by splash damage or after 20 seconds.
- They will explode after about three seconds in case you place them near your own flag (a.k.a. "short fuse").
- They deal up to 100 damage each. Placing more of them near each other can cause deadly contemporary detonations.
- They cause "splash" damage, but no "direct" damage, with the only exception of "the juiced effect".
- The prox mines are color coded and they will not cause any harm to you (even with friendly fire active) although they can push you back. You and your teammates will not trigger the explosions of your mines, but -in case friendly fire is active- you may risk to kill your teammates by attaching mines to them, or if they are near them when they detonate for some other reason!
- Mines are normally only found in team games but should you get a mine launcher in a non-team based gametype (as Free For All) then the mines will not be color coded and you will trigger your own ones, although they will still not deal any damage to you.
- In addition to the above, you can combine a Quad Damage with a well-timed mine on the ground to attempt a very high mine jump.
- Mines on players are hidden, and remain active on the corpse until the body disappears.
- Mines on players explode after about 10 seconds, causing their maximum damage to the player affected. After the initial "you have been mined" message, you can see the "internal combustion" countdown: you can try to get enough health and armor bonuses to survive before time runs out, and/or to stay near opponents when exploding, hoping to bring them in hell together with you.
- Proximity mines are the only weapons that can penetrate the force field of Invulnerability powerup. Just a single proximity mine can kill the Invulnerability user in a bubble of blood (a.k.a. the "juiced effect"), after just a few seconds.
- While battle suit powerup gives complete protection against damage from proximity mines, it cannot save you from the "juiced effect".
- Ammo box name: Proximity Mines
- Weapon number: 12
ChainGun[]

- A powerful Gatling gun. Similar to the Machine gun, but fires ammo at a much faster rate. It can be very deadly at close range but its ammo will not last long.
- Damage per shot is identical to the machine gun: 7 (but it is still 7 also in TDM mode). The spread is about 3 times larger than the machinegun, so it's not adapt for long range.
- Ammo box name: Chaingun Belt
- Weapon number: 13
Grappling hook[]
Grappling hook, also known as "grapple" or "hook" for short, is not a normal weapon, as it's not desiged to hurt people. As it's rarely included in maps, you can play with it in Elimination, CTF Elimination or Last Man Standing game modes, or with g_elimination, with the corresponding option enabled.
Offhand grapple is selected like a weapon in your inventory. Select it, then shoot to a wall and hold the button: you will be dragged there and you will remain there until you release the button. While you are hanging, you can switch to a "real" weapon, and shoot your enemies: in this case, you will detach only when you select the hook again, without pressing fire button.
- Weapon number: 10
Notes:
- Do not try to stay attached to a jump-pad: you would die in a very short time.
- It does not require ammo.
- It is also known as "offhand grapple", but the "offhand" adjective does not really fit the behavior of the hook in the base game, as it requires to be selected like a weapon. That adjective better fits some mods which have a quick, dedicated "grapple button".
- Other notes about it, such as the reason why bots do not use it, are in the Appendix of this page.
Pickup rules[]
- You can collect up to 200 shots per weapon. Having 200 shots blocks ammo pickups for that weapon, but not the weapon pickups.
- Taking a weapon pickup fills up to a basic amount of ammo. If you already have more ammo than that, it only adds 1 shot. Exception is Team Deathmatch where you always get the basic amount added.
- Although picking up a machine gun theoretically gives a basic amount of 40, this is quite unlikely to happen. Usually, all players spawn already owning the machinegun, with 100 ammo for it (50 in Team Deathmatch mode): usually you do not find machinegun weapon pickups in maps, but machinegun ammo boxes (bullets) only.
- Picking up ammo boxes for weapons you don't own yet has got the only effect of preventing other players from picking them up, as you will not find such "previous" ammo in your inventory when you will get the weapon. In other words, the content of ammo boxes for which you don't own the corresponding weapon is discarded. Exception is TDM mode, where also ammo boxes picked up before getting the corresponding weapon do count.
Normal values are:
| Weapon | basic ammo | ammo charge (ammo box) |
|---|---|---|
| Gauntlet | - | - |
| Machine Gun | 40 | 50 |
| Shotgun | 10 | 10 |
| Grenade Launcher | 10 | 5 |
| Rocket Launcher | 10 | 5 |
| Lightning Gun | 100 | 60 |
| Rail Gun | 10 | 10 |
| Plasma Gun | 50 | 30 |
| BFG10K | 20 | 15 |
| Nail gun | 10 | 20 |
| Prox mine launcher | 5 | 10 |
| ChainGun | 80 | 100 |
These normal values may be overridden by specific item settings.
Respawn time[]
Ammo and Weapons[]
Ammo pickups (ammo boxes) respawn after 40 seconds. Weapons respawn by default every 5 seconds, except for Team Deathmatch where they do every 30 seconds; however timings may differ.
Weapons comparison table[]
This table reassumes weapons properties. These values refer to the main game.[2]
| Weapon | Type | Reload Time (ms) | Direct Hit Damage per Pellet | Max Splash Damage | Splash Radius | Projectile velocity | Pellets shot | Spread | Basic Ammo | Ammo Box | Weapon Number |
| Gauntlet | Melee | 400 | 50 | n/a | n/a | n/a | n/a | n/a | Infinite | n/a | 1 |
| Machinegun | Hitscan | 100 | 7 (5 in TDM mode) | n/a | n/a | n/a | 1 | 200 | 40 (see note)[3] | 50 | 2 |
| Shotgun | Hitscan | 1000 | 10 | n/a | n/a | n/a | 11 | 700 | 10 | 10 | 3 |
| Grenade Launcher | Projectile | 800 | 100 | 100 | 150 | 700 | 1 | 0 | 10 | 5 | 4 |
| Rocket Launcher | Projectile | 800 | 100 | 100 | 120 | 900 | 1 | 0 | 10 | 5 | 5 |
| Lightning Gun | Hitscan | 50 | 8 | n/a | n/a | n/a | 1 | 0 | 100 | 60 | 6 |
| Railgun | Hitscan | 1500 | 100 | n/a | n/a | n/a | 1 | 0 | 10 | 10 | 7 |
| Plasma Gun | Projectile | 100 | 20 | 15 | 20 | 2000 | 1 | 0 | 50 | 30 | 8 |
| BFG10K | Projectile | 200 | 100 | 100 | 120 | 2000 | 1 | 0 | 20 | 15 | 9 |
| Nailgun | Projectile | 1000 | 20 | 0 | 0 | 555 to 1800 | 15 | 500 | 10 | 20 | 11 |
| Prox Launcher | Projectile | 800 | 0 | 100 | 150 | 700 | 1 | 0 | 5 | 10 | 12 |
| Chaingun | Hitscan | 30 | 7 | n/a | n/a | n/a | 1 | 600 | 80 | 100 | 13 |
See also[]
- Appendix for this page with additional notes and related console commands and mods.
- Manual/Items
- Manual/Map elements
- Disabling and replacing items
Notes[]
- ↑ "Vanilla" is intended to mean the "base" game.
- ↑ Values have been checked from OpenArena 0.8.8 source code, as seen here, however they are very unlikely to change, considering that OA aims to keep the original Q3 gameplay as much as possible.
- ↑ In reality, it is very unlikely to actually find a machinegun weapon spawning in the map (that would theoretically have 40 ammo, as shown in the table). Usually, players spawn already owning machinegun (with 100 ammo, except TDM mode where they spawn with 50 ammo for it), thus maps usually contain machinegun ammo boxes (bullets) only and not the proper weapon to pickup.
External links[]
- Quake III Arena Guide - Weapons on PlanetQuake
- Quake III Team Arena Guide - Weapons and Items on PlanetQuake
| Appendix available |
|---|
|
This page has got an "Appendix" sub-page, which may contain useful extra infos, such as console commands related with the features mentioned in this page, or hints for better usage. After reading this page, don't miss to give a look to its "Appendix", too: |
Map Elements[]
The arenas may include various kinds of thing that may interact with you.
If you are interested in weapons you can pick-up and use, please read Manual/Weapons. If you are interested in items you can pick-up, please read Manual/Items (flags are covered in later in this page instead).
Environment[]
Accelerator Pads[]
Accelerator pads, or Acceleration pads or Launch pads, will make you perform very long jumps.
Similar to "bounce pads", but usually with horizontal push much bigger than vertical push. They affect people, while projectiles do not bounce.
Bounce Pads[]
Bounce pads (a.k.a. "jump-pads") will make you jump very high, usually to another platform.
Very similar to "accelerator pads", but usually with vertical push much bigger than horizontal push. They affect people, while projectiles do not bounce.
If you jump over them, instead of simply walking over them, you will get a little higher push. If you rocket jump over them (making the rocket explode on their surface), you will get an enormous push.
Lifts[]
Lifts will usually be activated when you get over them. They usually stay in their lower position, and then go up to their raised position when someone gets on them.
Platforms[]
Unlike lifts, moving platforms always move.
Gates and Teleporters[]
Gates and teleporters are situated statically in some scene maps. They take you from one room to another. Movement is sometimes bi-directional, sometimes one-way only. Gates and teleporters work the same, the only difference is that gates also allow you to see what there is where they will bring you. Their aspect may vary (e.g. they may be similar to mirrors, to doors, to platforms, to force fields, or be completely invisible).
It is not advisable to stand in the exact place where players re-appear while exiting from a teleporter, because you would be instantly killed (a.k.a. "telefragged") when someone would be teleported there: player standing on the spawning point dies, player spawning lives.
Gates and teleporters work with people, but not with projectiles. Projectiles fired against a teleporter will not be teleported, but will simply impact on its surface or continue flying behind it (depending whether the map creator made the gate as a solid object or not). Trivia: along with other features, in the Alternate Fire mod the non-instant-impact projectiles are teleported instead, so you may see them appearing from a gate (even seemingly out from nothing) there.
Gates are also known as Portal teleporters, or simply Portals.
You will find many more standard teleporters than gates in the game, due to the fact that gates, like mirrors, may cause a lot of more polygons to be drawn in the scene. Map creators: see Creating a portal page.
"Personal teleporter" is instead an holdable item, not a "map element" (we mention it here just because we are talking about teleporters). If you get it, then you can activate it with ENTER (by default), and it will teleport you to a random player spawn location.
Water[]
Under-water swimming is possible for a limited amount of time (until player gets out of breath and begins to lose health: after about 10 seconds without breathing, you start getting severe damage, and die quickly if you don't find air). Press jump key ("spacebar" by default) to go to the surface, and even quicker is when you also (so together with space) look upwards and press forward (default W). Pressing the crouch key ("c" by default), instead, will help you go deeper. Swimming is slower than usual running, its speed is similar to walking. Jumping can sometimes help you getting out from a pool. Standard armor does not protect against this kind of damage; wearing the "battle suit" power-up gives complete protection against drowning.
If the water is not deep enough to swim: if there are just few centimeters of water on the floor, you will not notice problems other than running a little slower than usual; if there are some more centimeters of water, you will run more slower (at the speed of walking), and will "slide" a little.
Fog of death, Lava and Void[]
Jump in either "fog of death", lava or void and you will die a surprisingly quick death. You'll also lose a point. "Battle suit" will completely protect you from lava, but not from "fog of death" and void: instead, the battle suit reduces their damage by 50%.
Slime[]
Green liquid that will damage you if you touch it, but not as deadly as lava is. "Battle suit" protects you from it.
Fog[]
The simple fog, unlike the "fog of death", will not kill you, but will simply disturb your visual, hiding far objects.
Triggers[]
You may find some buttons around, that activate some mechanisms (like doors or traps). Some are activated when touching them, while others are activated when shooting at them. Triggers may be invisible and intangible (e.g. activating some mechanism while just entering a certain room).
Doors[]
Usually, doors will automatically open when you get near to them, or when you shoot at them. Some may need to activate a trigger somewhere, or may be time-activated.
Fixed weapons[]
Some maps may include some weapons (rocket launcher, plasma gun, grenade launcher) attached to the walls, and automatically activated when someone approaches the area, or manually activated by a trigger button.
Other traps[]
Other traps may include moving pendulums, moving walls, trapdoors, hurting or instant-killing objects.
Force fields[]
Some maps may include force fields that can give you health, armor, weapons, ammo or power-ups when you are inside them, instead of the standard picking up things (aspect and effect depends from map creator).
Be aware that there may also be some shining/lightning objects that are programmed to hurt or kill you when you touch them... a very different kind of force fields!
Slick surfaces[]
Slick surfaces are surfaces with reduced friction (e.g. "slick" parameter may be applied to icy surfaces). They cause you to slide.
Shooters[]
Maps may include some built-in weapons, known as "shooters". Shooters act as traps, and usually fire when activated by some kind of trigger (example: when a player enters a room, some grenades may be thrown in). Grenade launcher, Plasma gun and Rocket launcher are the weapons that can act as "shooters".
Spawn points[]
You may not see them, but without them you would not be able to play. They are the places in the map where the characters and objects appear. They exist spawn points for players, for teams, for weapons, for power-ups, etc. Spawn points positions and related items may vary depending from the gametype.
It is not advisable to stand in the exact place where you spawned. If someone else would respawn on a certain (players)spawn point while you are standing there, you would be instantly killed (a.k.a. "telefragged").
[]
Some gametypes will include some more items in the arena.
In base game you cannot drop any item you have, unless you die, but some mods may include additional commands to drop some kind of item. In base game, in extreme need of passing a flag to a teammate of yours, you may have to suicide yourself (/kill).
Red and blue flags[]
The red and blue flags are used in Capture the Flag and CTF Elimination game modes. Red flag is usually in the "red base" and the blue flag in the "blue base". You have to grab the other team's flag ad bring it to your own base, defending your flag in the meanwhile. Red and blue flag will also appear in the two bases during some other gametypes, but you will not be able to pick-up them (you may have to bring something to them, instead).
Neutral flag[]
The "neutral flag" (also known as "white flag" or "grey flag") is used in One Flag Capture gametype. It usually spawns in the middle of the map, and you have to bring it to the enemy base.
Note: in Domination gametype, the fixed "domination points" currently look like flags, and are "neutral" at the beginning of the match, until a player touches them for the first time (then they are colored and bring points to that team). They look like flags, but they are different items.
Skulls[]
Some skulls may simply be decorative elements of the arenas, but we want to talk about the skulls used in Harvester gametype. They will appear in the middle of the map when you kill an enemy, and then you will have to bring them to the enemy base.
Obelisks[]
Obelisks are objects that are used in Overload mode. You have to reach the enemy base and shoot at the obelisk: you have to destroy it to score. But it can get very much damage before being destroyed, and its health points automatically regenerate.
Domination points[]
Domination points are objects in the map that are used in Domination mode. When you will touch one of them, it will take the colour of your team, and your team will begin to score points as the time passes. If an enemy touches it, the point will change colour, and the enemy team will begin to score points. You have to conquer and maintain the domination points around the map. They look like red and blue flags, and like neutral flags until someone touches them for the first time.
Double Domination points[]
Double Domination points are objects in the map that are used in Double Domination mode. They are "A" and "B". Your team has to conquer both of them and maintain them both for ten seconds, in order to score.
See also[]
Controls[]
Knowing how to control your own character is obviously an important aspect of the game. So, let's take a look to the control system.
Controls[]
These are default base controls:
- To move forward: W
- to move back: S
- to move to the right (strafing, not turning): D
- to move to the left (strafing, not turning): A
- to jump (and to swim upwards): Space Bar
- to crouch (and to swim downwards): C[1]
- to shoot: left mouse click or CTRL
- to use "holdable items" (for example Portable Medkit): Enter
- to switch weapon: mouse wheel or [ and ] keys[2]
- to look around/turn just simply move the mouse around[3]
You can customize your controls as you wish, from SETUP --> CONTROLS menu. This menu is divided into look, shoot, move, misc sections. You should give a rapid look to all of them. Some mods may include some more options.
Some options can simply be turned on or off, few have a sliding selector, and most need that you click them and then push the button you want to "bind" to them. Please be careful: if you click the wrong option, press "escape" key before any other key to avoid update. Using this menu, you can bind up to two keys to a single function, and you cannot assign two different functions to a single key (old function will "lose" that key, and there is no warning this happens).
You probably may want to select your favorite "autoswitch weapons" mode (or completely disable it, please read below) from "shoot" screen and to bind a key for "chat - team" function (say_team is an useful feature to write messages to your teammates only) from "misc" screen. Generic "chat" (say) feature, to write text to all people in the server, is binded to "T" key by default.
You can also use \bind command from command console to bind keys, and few other commands to manage bindings (see key binding).
Run: by default, "always run" option is enabled (and it is highly suggested to keep it enabled!), thus, pushing the "run/walk" button ("shift" key by default) will make you walk slowly. This is a fast-paced shooting game, that mainly focuses on quick roaming around arenas and shooting at everything that moves... hiding and "camping" should be only a little part... in this game you should almost always run, and staying still may easily cause your death... but sometimes you may want to move silently anyway: while walking, enemies will not be able to hear your footsteps.
"Normal" running speed depends from g_speed server-side variable[4] (however it's possible to reach much higher speeds through strafe jumping), while walking is about half that speed, and moving crouched is about a quarter of running speed.
Advanced techniques: to learn about advanced techniques, some of which can be very useful (most notably, strafe jumping and rocket jumping), take a look to Manual/Techniques page.
Autoswitch weapons[]
The "autoswitch weapons" feature causes your character to automatically change weapon when picking up one (a weapon, not an ammo box). It is placed in SETUP -> CONTROLS -> SHOOT menu and corresponds to the cg_autoswitch <number> variable in console.
Note: in any case, the game will automatically switch to another weapon when you run out of ammo with the current one and try to shoot again.
It is important to say that since the original Quake 3 Arena and up to OpenArena 0.8.5, the only supported modes were "off" and "on" (and it is still true while playing with old mods!): you were able to choose if you wanted to change weapon only manually (cg_autoswitch 0, advisable value) or if your character had to immediately select the weapon he just runned over (cg_autoswitch 1, was default value at the time) -of course, you are able to change it again immediately after if you wish, but it takes a little time and may be a problem if this happens during a gunfight-.
Since OpenArena 0.8.8, new values are supported, thus you can now choose:
- NEVER - cg_autoswitch 0 - Never autoswitch weapons (change weapons manually only, when you really want to). Advisable for players who want complete control. It used to be known as "off" or "disabled".
- ALWAYS - cg_autoswitch 1 - Always chooses the weapon you just picked up (even if you already had it). It does not care about the "better weapons list" variable (any kind of weapon can trigger the switch). It used to be known as "on" or "enabled" (nowadays more autoswitch modes may fit the "enabled" definition, so it is better to use the proper names instead... except while using old mods, where everything different than 0 will "always" cause weapon change, so still using generic "enabled" term may still have sense there).
- NEW - cg_autoswitch 2 - Automatically selects the weapon you just picked up, but only if you didn't have it before. It does not care about the "better weapons list" variable (any kind of weapon can trigger the switch). Default value since OA 0.8.8 binaries.
- BETTER - cg_autoswitch 3 - Automatically selects the the weapon you just picked up, but only if it is "better" than the one you are currently using (even if you already had it). The switch is triggered only if both currently used and picked up weapon are listed in the "better weapons" list variable.
- NEW&BETTER - cg_autoswitch 4 - Automatically selects the weapon you just picked up, but only if it is "better" than the one you are currently using and (at the same time) you didn't have it before. The switch is triggered only if both currently used and picked up weapon are listed in the "better weapons" list variable.
"Better weapons" list (a.k.a. "weapon order" list) is customizable, being defined by cg_weaponOrder variable. Its default value, in 0.8.8 (it may change in future versions), is "/1/2/4/3/6/7/8/9/5/" (meaning gauntlet/machinegun/grenade/shotgun/lightning/rail/plasma/BFG/rocket, see Weapon numbers section).
You can change the order as you wish, keeping the same format (using slashes as shown; numbers on the right are those considered "better" by the autoswitch feature), e.g. you may enter /cg_weaponOrder /1/2/4/12/3/11/8/6/13/7/5/9/ as a nice order (please remember that both currently used and picked up weapon have to appear in the list, or the switch will not occur in cg_autoswitch mode 3 or 4, as the function would lack the data required for comparison).
Taking in account that removing a weapon from the list disables both switching FROM and TO that weapon -in modes 3 and 4-, you may probably want to keep all weapons in your list (except weapon 10, the grappling hook, that is not exacly a weapon): to prevent autoswitch TO a specific weapon you don't like, but allowing autoswitch FROM that weapon, just place it on the left, giving it a lower priority than gauntlet or machinegun (note: machinegun and gauntlet are very unlikely to be found in the maps, because you usually spawn with them already in your inventory).
While using old mods, any cg_autoswitch value different than 0 will have the same result as 1 (always autoswitch weapon), except in the case where the mod itself included its own extra autoswitch options, but it's quite unlikely. Therefore, you may want to completely disable autoswitch at least while playing old mods, by setting the variable to 0 (after its initial creation, your configuration file in each mod will be mostly independent from your configuration file in baseoa -see also Manual/Using mods-).
Weapon numbers[]
See also: Manual/Weapons
This may be useful for both manually binding keys to directly recall each weapon (/bind <key> weapon <weapon_number>, e.g. /bind 1 weapon 1) -altough it may be more comfortable to use the SETUP -> CONTROLS -> SHOOT menu- and to customize the "better weapons" list for the autoswitch weapons feature (/cg_weaponOrder, used when /cg_autoswitch is set to 3 or 4) in OpenArena 0.8.8 or later.
Weapons are numbered as follows:
- Weapon 1: gauntlet
- Weapon 2: machinegun
- Weapon 3: shotgun
- Weapon 4: grenade launcher
- Weapon 5: rocket launcher
- Weapon 6: lightning gun
- Weapon 7: railgun
- Weapon 8: plasma gun
- Weapon 9: BFG
- Weapon 10: offhand grapple (not exactly a weapon, therefore it would have very little sense placing it in the "better weapons order" list)
- Weapon 11: nailgun
- Weapon 12: proximity mines
- Weapon 13: chaingun
Please refer to Manual/Weapons for more infos about weapons.
See also[]
Notes[]
- ↑ Crouching (also known as "ducking") is NOT recommended while falling down: landing while crouching would make it more probable to get damage, and to get more than usual; however, the maximum falling damage is still 10 health points (except the case you fall in purposely designed "deadly pits", but this is a different story). Be aware that crouching makes you move silently, but slower than walking.
- ↑ The gauntlet (melee weapon that does not require ammo) is not selectable by using the previous/next weapon commands (mouse wheel or [ and ] keys, by default), but requires to use its specific key (1 by default) instead.
- ↑ To look around with the keyboard, instead, you can turn left/right with left and right arrows, and look up/down with PageDown and Del keys by default (while End centers view). However, using the mouse is better.
- ↑ G_speed default value is 320.
Characters[]
Also see Characters, PlayerMDLs and Manual/Player settings#Model.
You change your in-game model by clicking the bottom right corner of the player setup menu. (If you are using 0.6 version, there is an invisible button there)
Angelyss[]

Angelyss is the leader of a gang of berserker beauties. A hunter since her teenage years, Angelyss is not one to take lightly. She originated from the Land Behind The Seven Ridges, where she was hunting for a living. Once when she was trapped by a mutant tiger, a void opened up that took her into the Arena. She reasoned that a survival horror with unlimited lives is better than a one with a single life. With some experience in the Arena, she learnt that running practically naked is actually more effective in stopping bullets than thick armor, as her opponents are mainly males. She uses a shock-and-awe strategy to paralyze other opponents, and to deepen the effect she wears very scarce clothing, consisting only of a rope and some straw, with armblades and a winged helmet. She established a gang accepting any girls with decent looks to accompany her. (See Angelyss).
Arachna[]

Arachna is a biologically engineered hybridized monstrosity; a catastrophic marriage of flesh and metal. She was created by a mad piercer, who wanted to take body modification to the next level. With the help of a mad scientist, he kidnapped a woman and took her to the scientist's lab. Unsuccessful attempts to get her humanoid form to bond with metallic structure have left her in a barely functional and permanent state of agonising pain. A cocktail of advanced drugs and a vivid memory of her engineered agony allow her to focus her efforts in the arena, where she takes great delight in projecting her own pain onto others.(See Arachna).
Ayumi[]
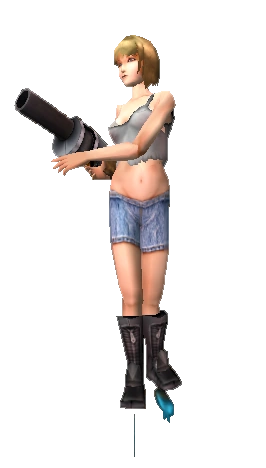
Once a poor girl living in the slums, Ayumi hit jackpot when she won the lottery. She was, however, pushed off a cruse ship by a disgruntled cousin. On her way to the bottom a voice gave Ayumi a choice, join the arena, or die. Figuring she had nothing to lose, Ayumi chose to join the arena. She is STILL looking for a way to get back at her cousin. (See Ayumi).
Beret[]
"Beret" is a easygoing ex-marine who was plucked from Iraq. Due to poor choice of suntanning location, he almost got hit by a stray RPG. Time seemed to freeze, Beret cacked his pants, and a voice offered him an avenue of escape. Confident he could handle it, and anything was better than death, he accepted, and vanished from earth. He is presumed dead, because everyone has assumed that he was vaporized by the RPG, leaving nothing but his chair behind. He continues to live, killing fellow competitors, and bemoaning the loss of his $5 sunglasses, which were not teleported with him. The other competitors give him crap about his beret, for which he has almost died on a mumber of occasions. Nobody knows his real name. (See Beret).
Grism[]
A man of few words and fewer mistakes, the unnamed space Marine has earned his place amongst the veterans of the Arena. While working as a guard for the notorious mega-corporation AGM, a lone Marine suddenly found himself in his very own hell. After fighting wave after wave of demons, his selection as an Arena combatant almost came as a blessing. Chosen originally for his masterful survival skills and threshold for pain, Grism has adapted well to the fast paced world that is the Arena, although he still maintains the wide-eyed grimace of a man dragged through the depths of the inferno. (See Grism).
Gargoyle[]
While statues of his diabolical visage adorn the towers of Notre Dame, villagers lived in blissful ignorance of his existence for hundreds of years. Known by many names, including Doccione, Ausguss, and the simple Gargoyle, he is an icon of fear, perversion, and deviance throughout the world. Now, taken from his seclusion into the rigorous trials of the Arena, he can no longer rely on fear alone. Fortunately, his quick reflexes and sadistic pleasures will do just fine. (See Gargoyle).
Kyonshi[]
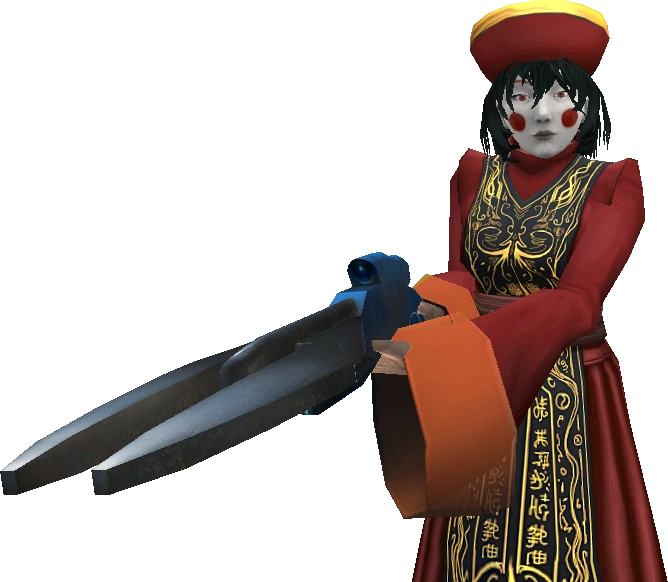
Kyonshi is a female Chinese jiang-shi, the jiang-shi are reanimated corpses that hop around, killing living creatures to absorb life essence from their victims. They are said to be created when a person's soul fails to leave the deceased's body, due to improper death, suicide, or just wanting to cause trouble. (See Kyonshi).
Liz[]
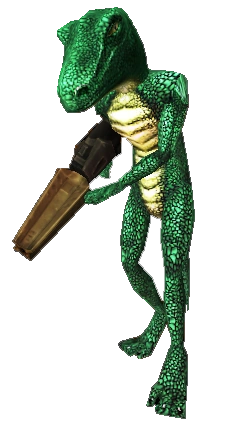
Currently only known as Liz, this creature is a member of an ancient race of dinosauroid humanoids. Original inhabitants of planet earth and direct descendant of the dinosaurs. After the cataclysm of Chicxulub, the few dinosaurs who survived mutated and evolved into a race of highly intellegent species of humanoid reptilians. Liz, then, a humanoid reptilian. as a member of the reptilian race, has vowed revenge against those who launched the meteorite of Chicxulub. (See Liz).
Major[]

Major's real name has since long been forgotten in favour of her outstanding skills in combat and ruthless commandment of troops. She was made major in charge of the troops in a far away scientific outpost in the border of the observable universe. Extensive military training for even the most improbable worst case scenarios could not prepare her for what she was to experience at the research facility in Gamma Espilbergonis XF-443. Demons unbeknownst to her torment the little of humanity that still guided her merciful decisions. Demons from outer dimensions? Inner dimensions? Her mind may be the only enemy that exists, nevertheless, she feels the need to destroy everything her mind senses in order to attain a little of tranquility. (See Major)(secret breakdancing reference missing!)
Merman[]
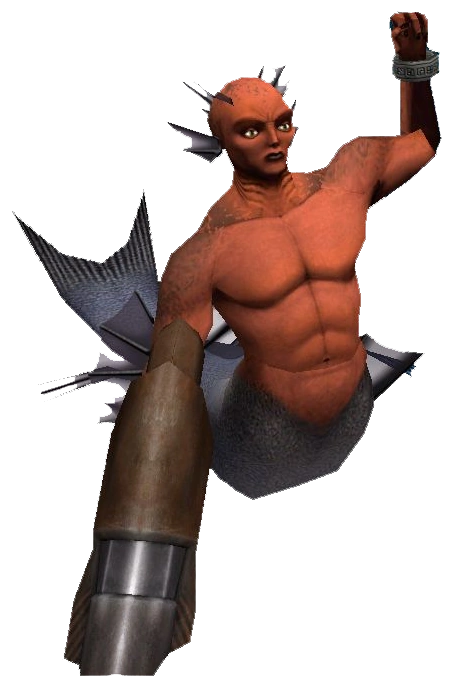
Merman was forced from his underwater home of Atlantas at a young age. He travels the universe looking for his lost home. Famous for his ruthlessness he was forced out when as a child after pushing his brother off a cliff. After this his rage exploded and he went on an orgy of killing and violence something he has been able to live in the Arena. To grow strong he drinks the blood of his enemies. He listens to Pink Floyd in his spare time. (See Merman).
Penguin[]

An over-enthusiastic Linux user, was working at an office job when he discovered a program in his computer to create a portal to the Arena. He hasn't had sexual contact in years, look behind yourself often, 'cause penguins are sneaky. you hear a subtle waddling in the night, and think nothing of it. But you should be afraid. Sneaky. Nefarious. Penguins. (See Penguin).
Skelebot[]
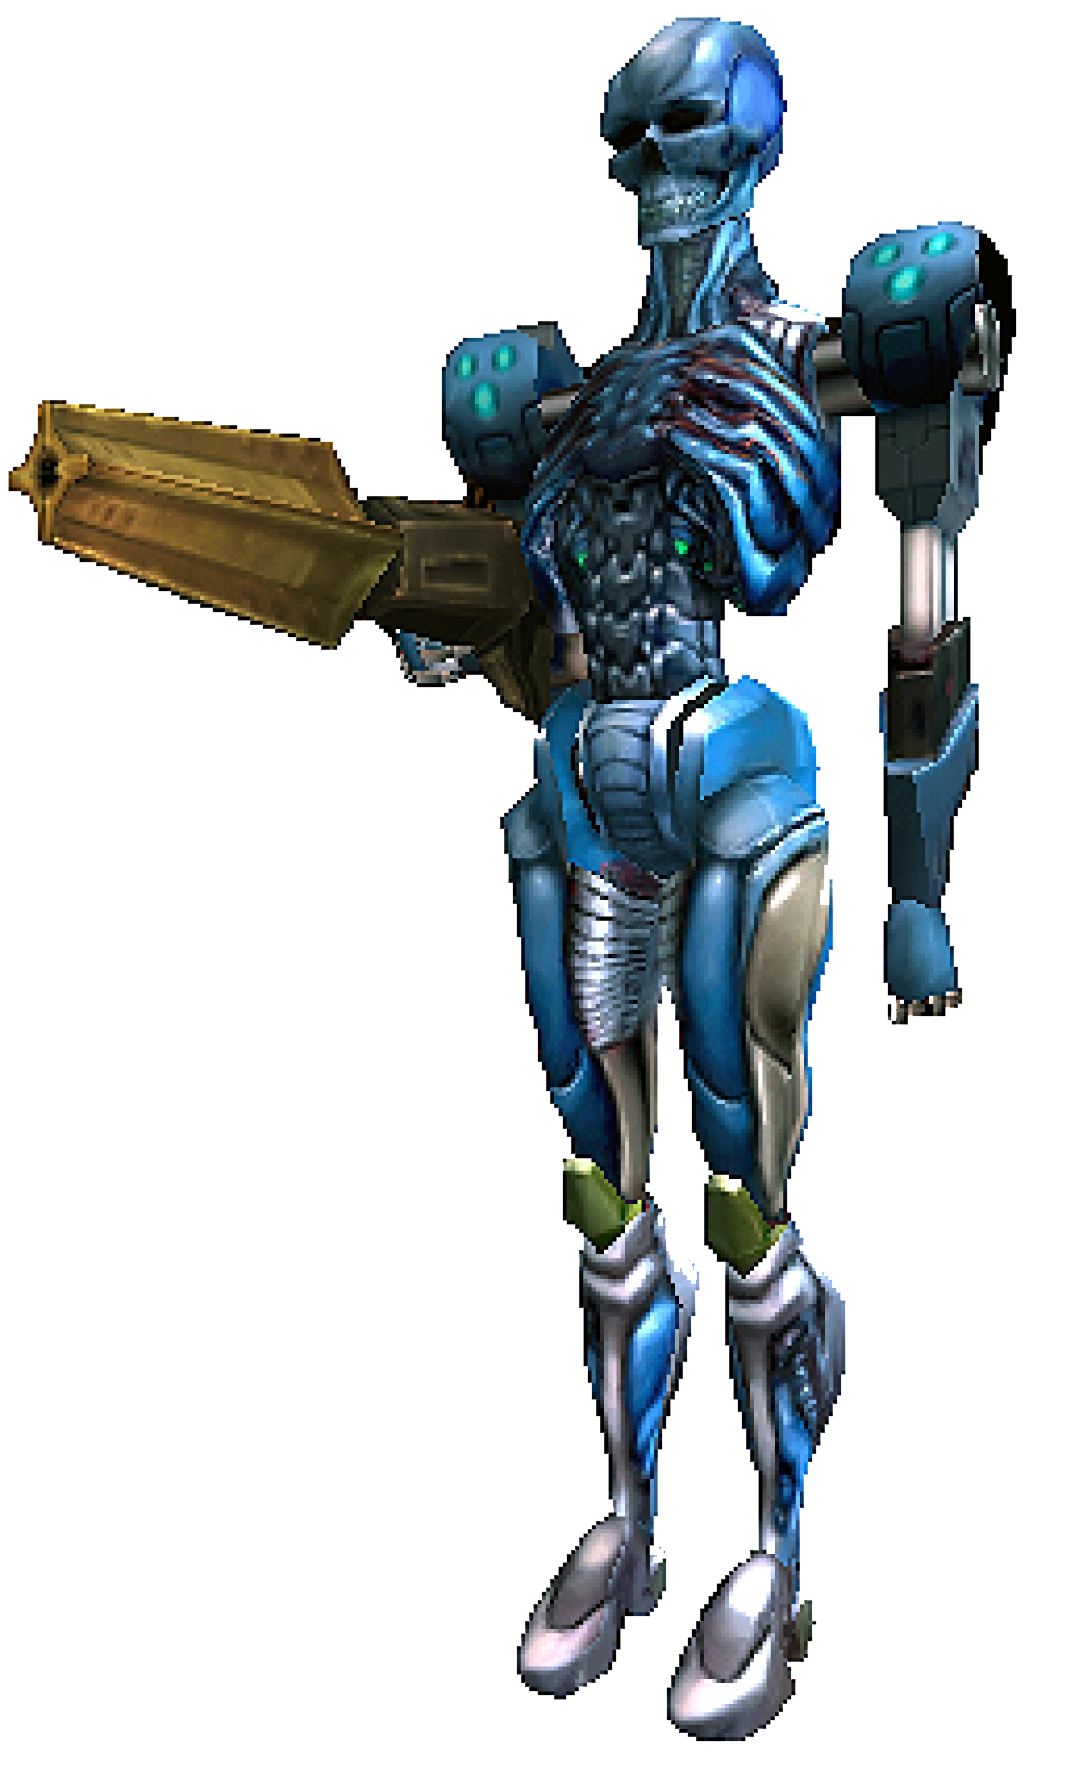
Skelebot is a robot experiment that went horribly wrong. He woke up with an insatiable desire to KILL those around him. Skelebot was built by Bill Gates as a creation that would end all open source programs forever. Bill made a fatal error when he tried to use Windows Vista to program the robot. Before they could save their operating system Vista got too bloated with bloatware. Instead of killing open source he was now programed to kill everything he can. Skelebot found a loving caring home in the arena where he can kill as much as he likes. (See Skelebot).
Sergei[]
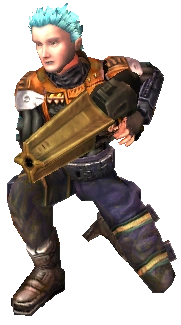
A disgruntled Russian. (See Sergei).
Tony[]
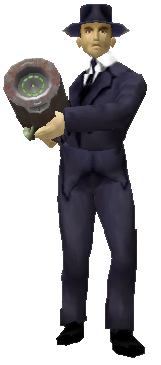
Tony was a double agent on the streets of Chicago. To criminals, he was known as a ruthless hitman; to the rest of the world, he was the prime detective on the force. One day while looking for his next big break in the case, he fell into the mob leader's trap and was severely wounded. Believing this was the end for him, Tony nearly gave in to death. A mysterious voice came from nowhere, asking him if he wanted to live. Not knowing where else to go, Tony answered yes, and he was sucked into battle in a far distant land. (See Tony).
See also[]
Credits[]
For credits, read the CREDITS file.
For more and up to date information, visit the website or the wiki: